
Solar for New Builds NZ: The Pre-Wire and Design Guide (2026)

If you're building a new home in New Zealand right now, you have something every retrofit solar customer in the country wishes they had: a clean sheet of paper. You can pick the roof orientation. You can spec the conduit runs before the GIB goes up. You can pick a switchboard with room for solar plus a battery plus an EV charger. You can decide where the inverter sits before the wall is even built. None of these decisions cost much extra now. All of them are expensive or impossible to fix later.
This is the guide for getting solar right from day one. Whether you're installing panels on the day you move in, or just keeping the option open for later, the decisions you make at design stage, slab stage, and pre-line stage are the ones that lock in your solar future. Or lock it out.
Written by Ben Wallis, a licenced NZ electrician, current as at May 2026. Honest trade-pricing ranges, no marketing fluff, no pretending we know your specific EDB or council. This is the page to read before you sit down with your architect.
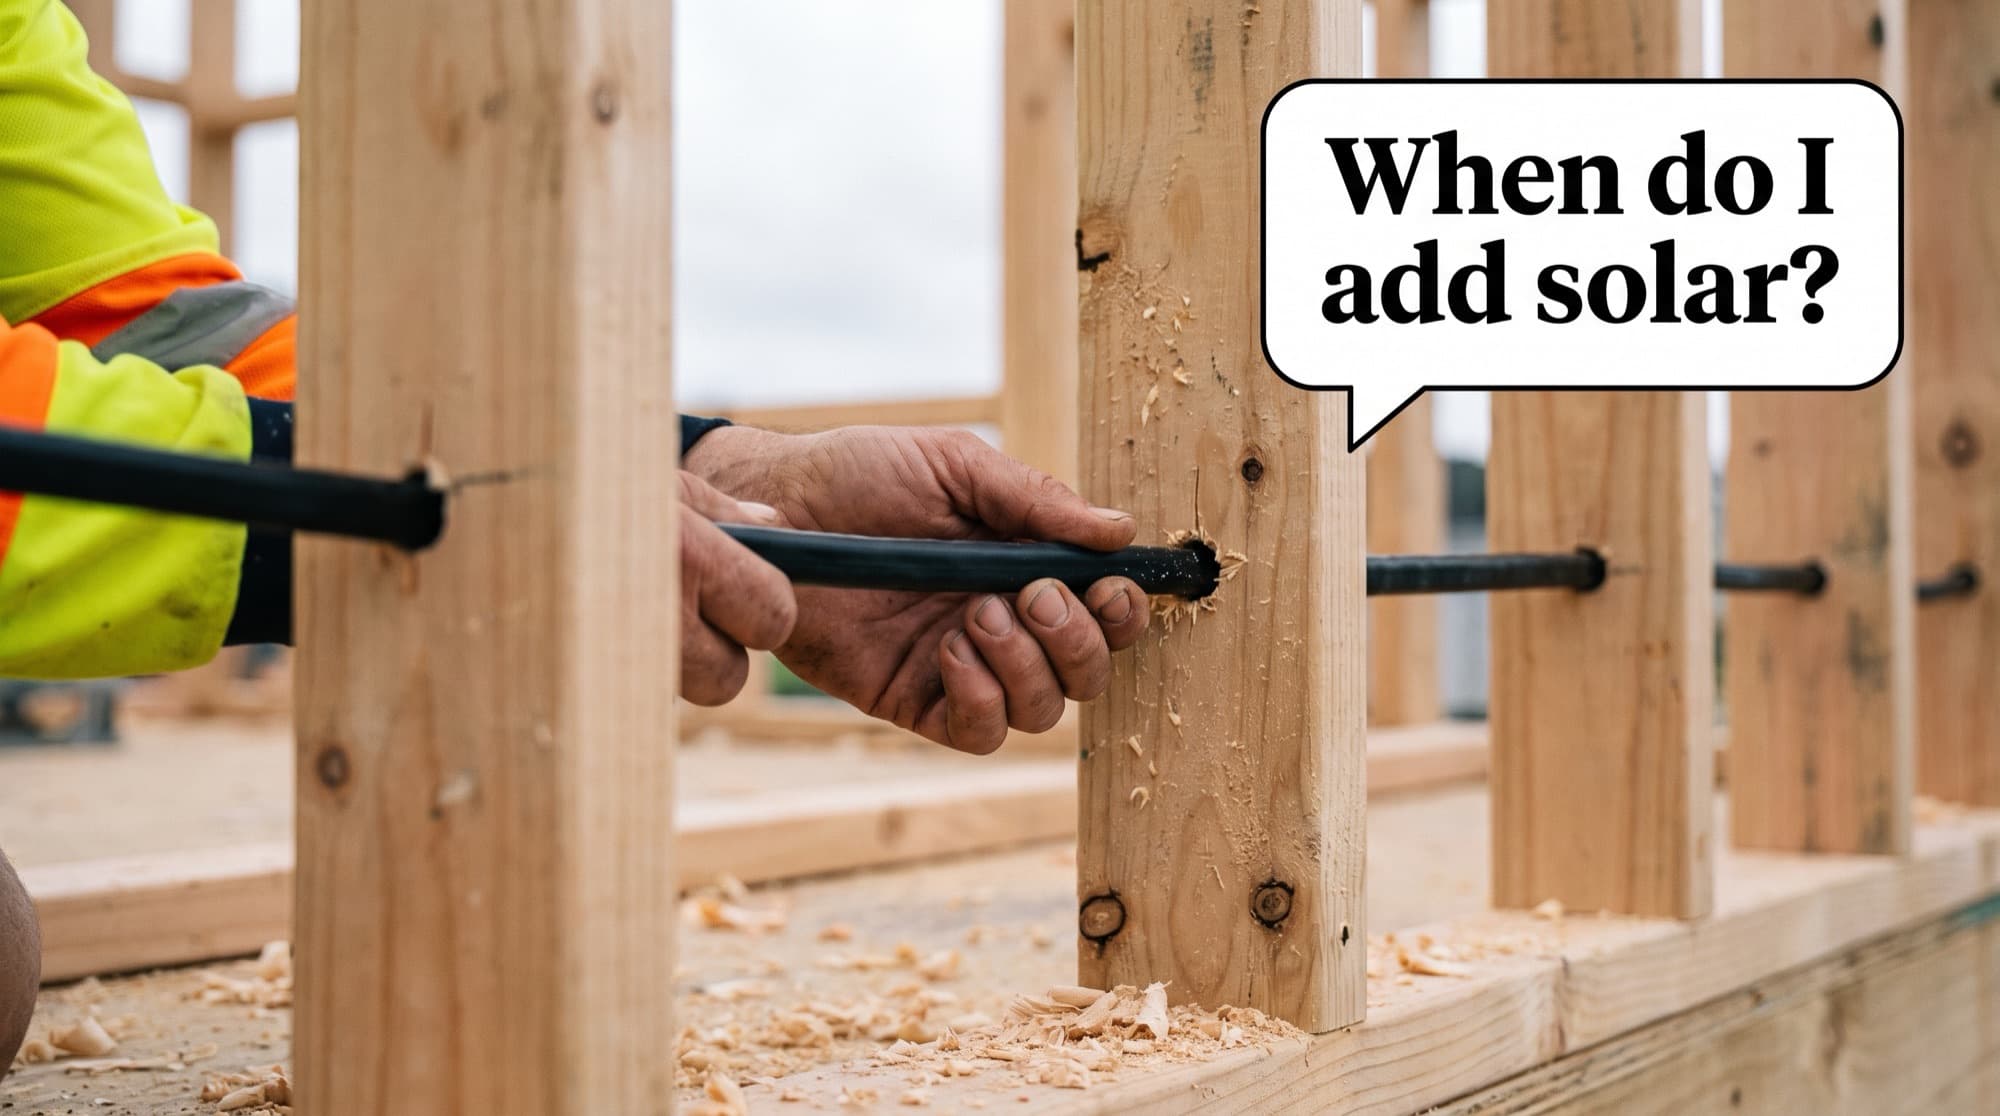
The Short Answer
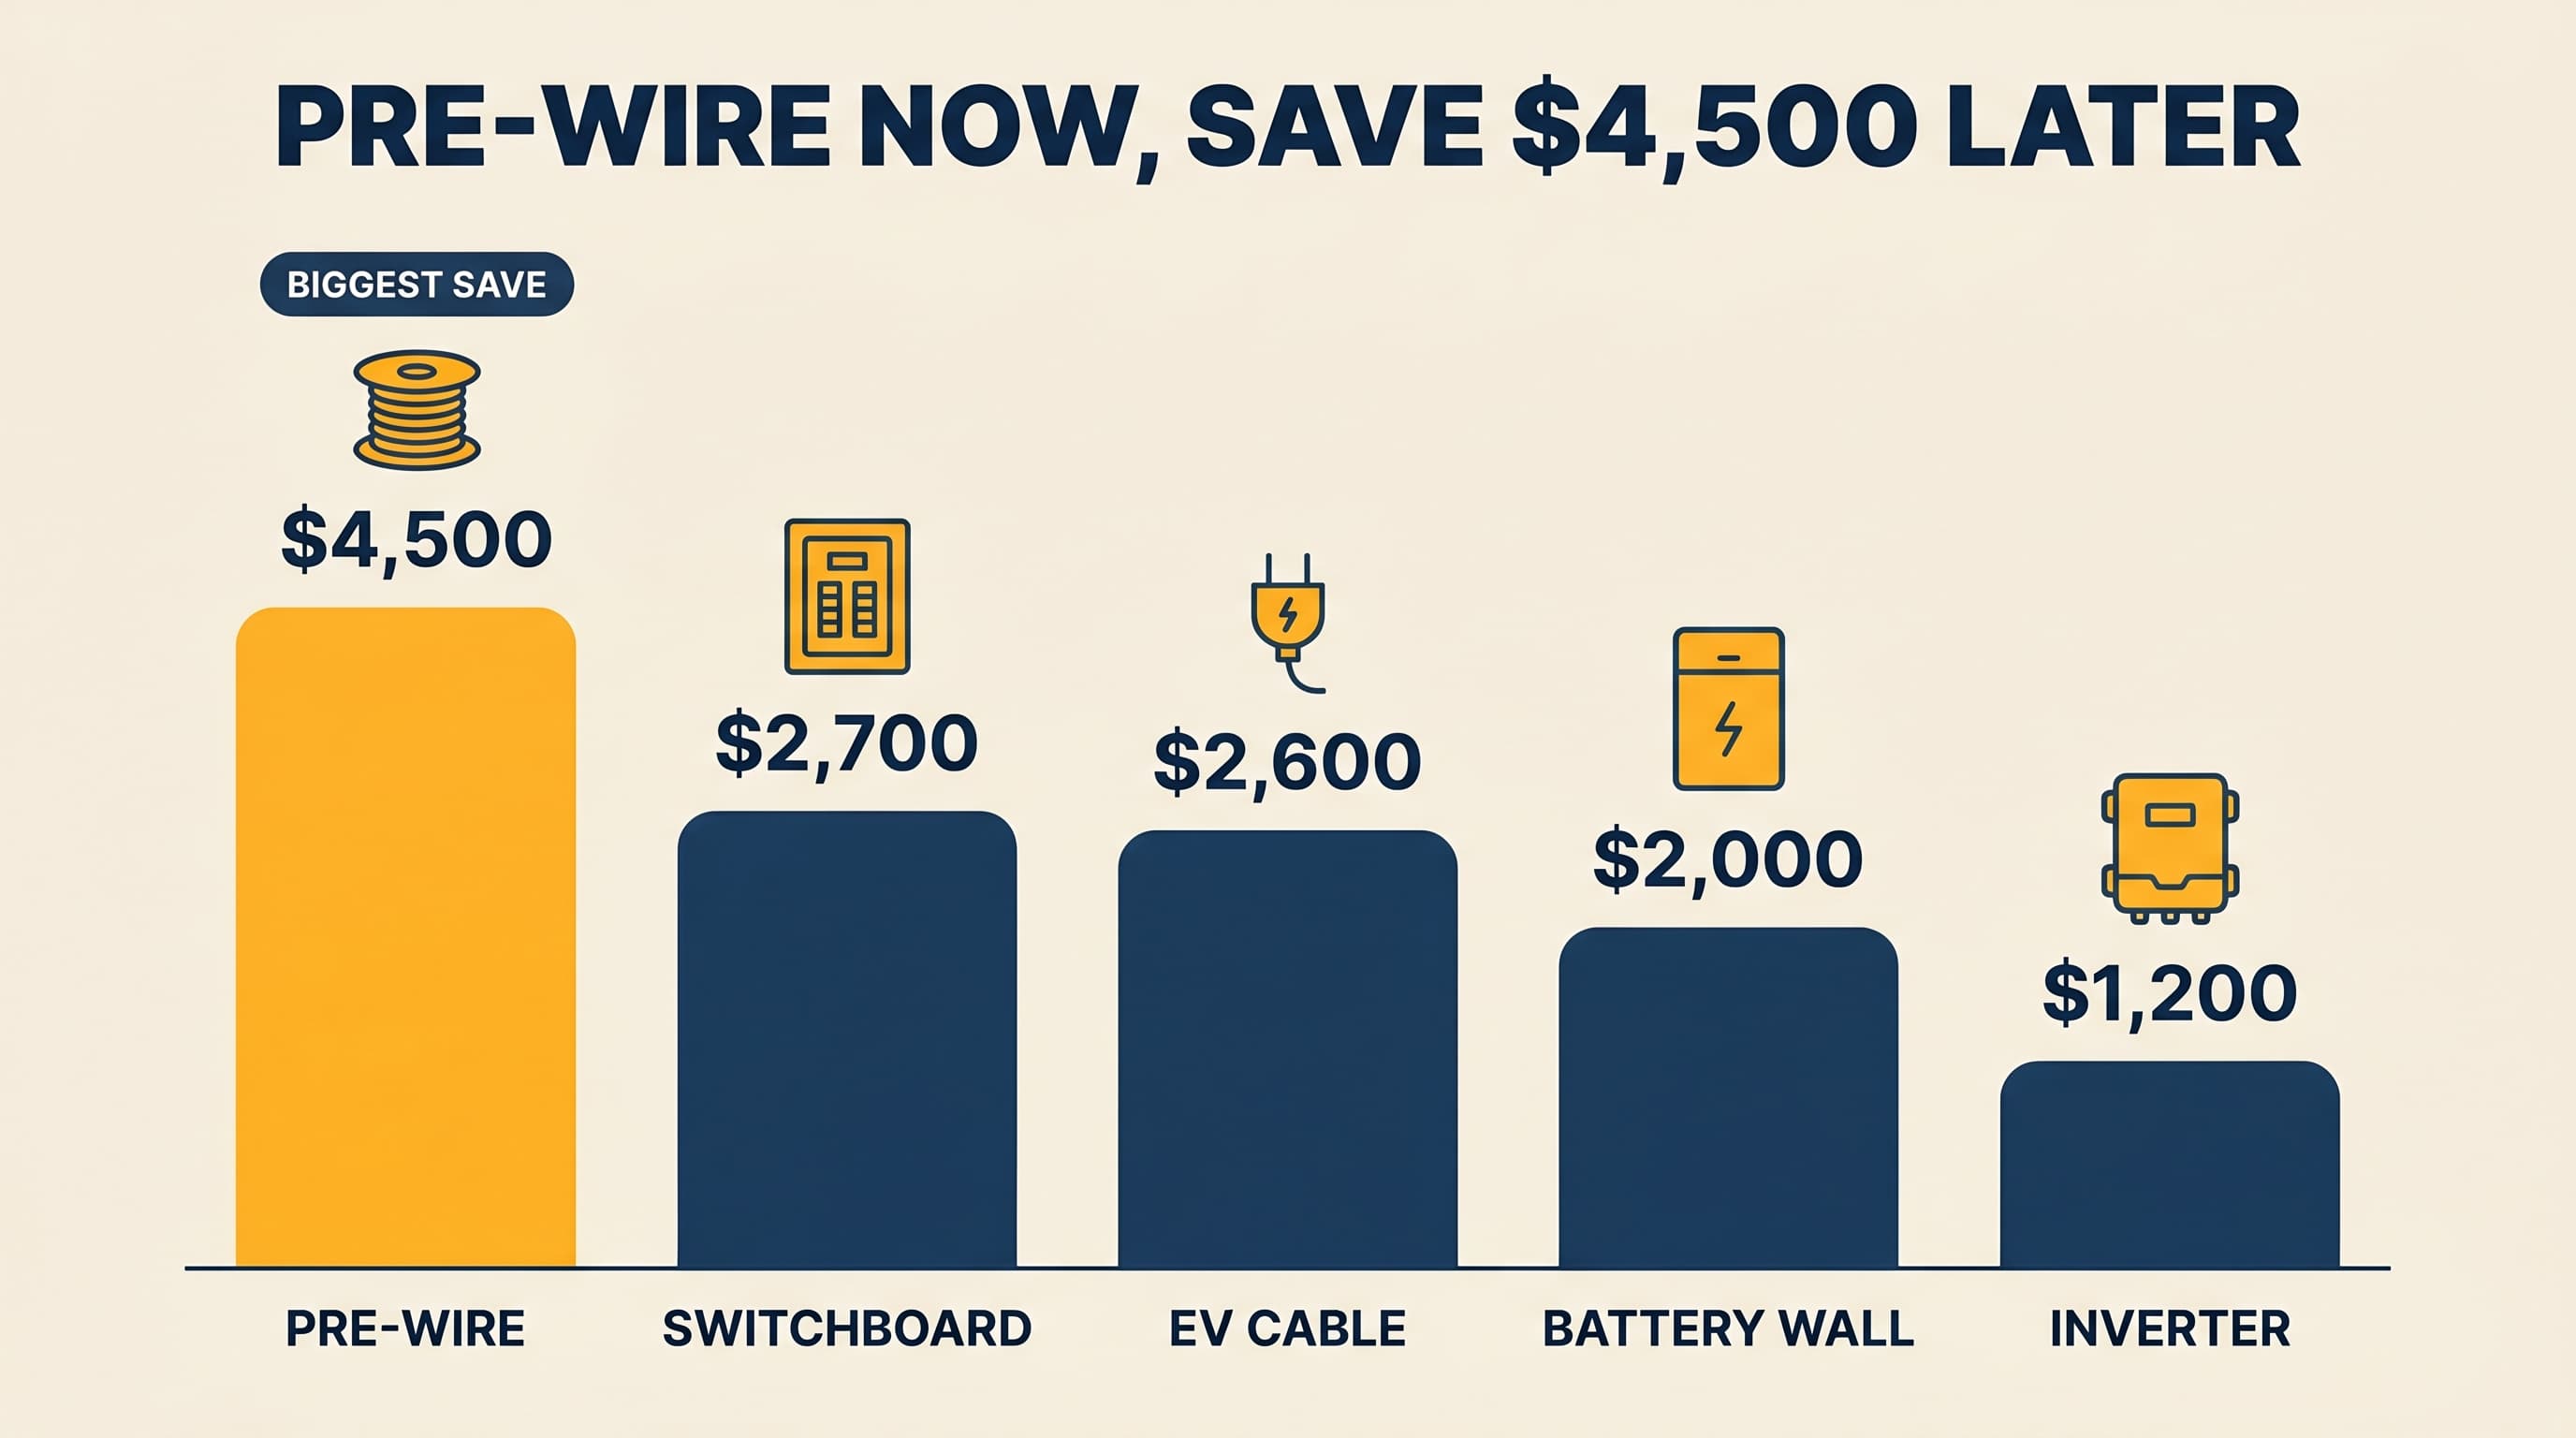
The single biggest advantage you have as a new-build homeowner is that solar pre-wire costs around $500 to install during the build. Retrofitting that same conduit later, after the walls are lined and the roof is on, runs $2,000 to $5,000. That's not a marketing number. That's the actual trade pricing differential for cutting GIB, fishing cables through a finished ceiling cavity, patching, and repainting.
The trap is that most homeowners don't think about solar until after they've moved in. By that point, the roof orientation is locked, the switchboard is undersized, the conduit isn't there, and the battery wall is where you put the linen cupboard. Each of those is a five-figure problem you would have paid a few hundred bucks to avoid at build time. This guide walks through the eight decisions that matter, in the order your build will face them.
Key takeaways
- Solar pre-wire at build time: $200-$500. Retrofit: $2,000-$5,000. Always do the pre-wire even if not installing solar now.
- North-facing primary roof plane at 20-35° pitch is ideal. Lock this at architect stage.
- Spec the switchboard for solar + EV + battery now (12-way + spare, 80-100A main). Upsizing later costs $1,500-$3,500.
- Designate a battery wall (1m × 0.5m clearance, ventilated, away from doorways) even if you're not buying a battery for years.
- The EDB application starts at building consent stage. Leaving it until CCC adds 4-8 weeks to the timeline.
- Total cost saving by making the right calls at build time vs retrofitting: around $5,000-$13,000.
Want to compare
quotes?
Get matched with vetted local installers and see real quotes for your home. It’s free, with no obligation.
Compare up to 3 quotesThe 8 Decisions That Lock In (Or Out) Your Solar Future
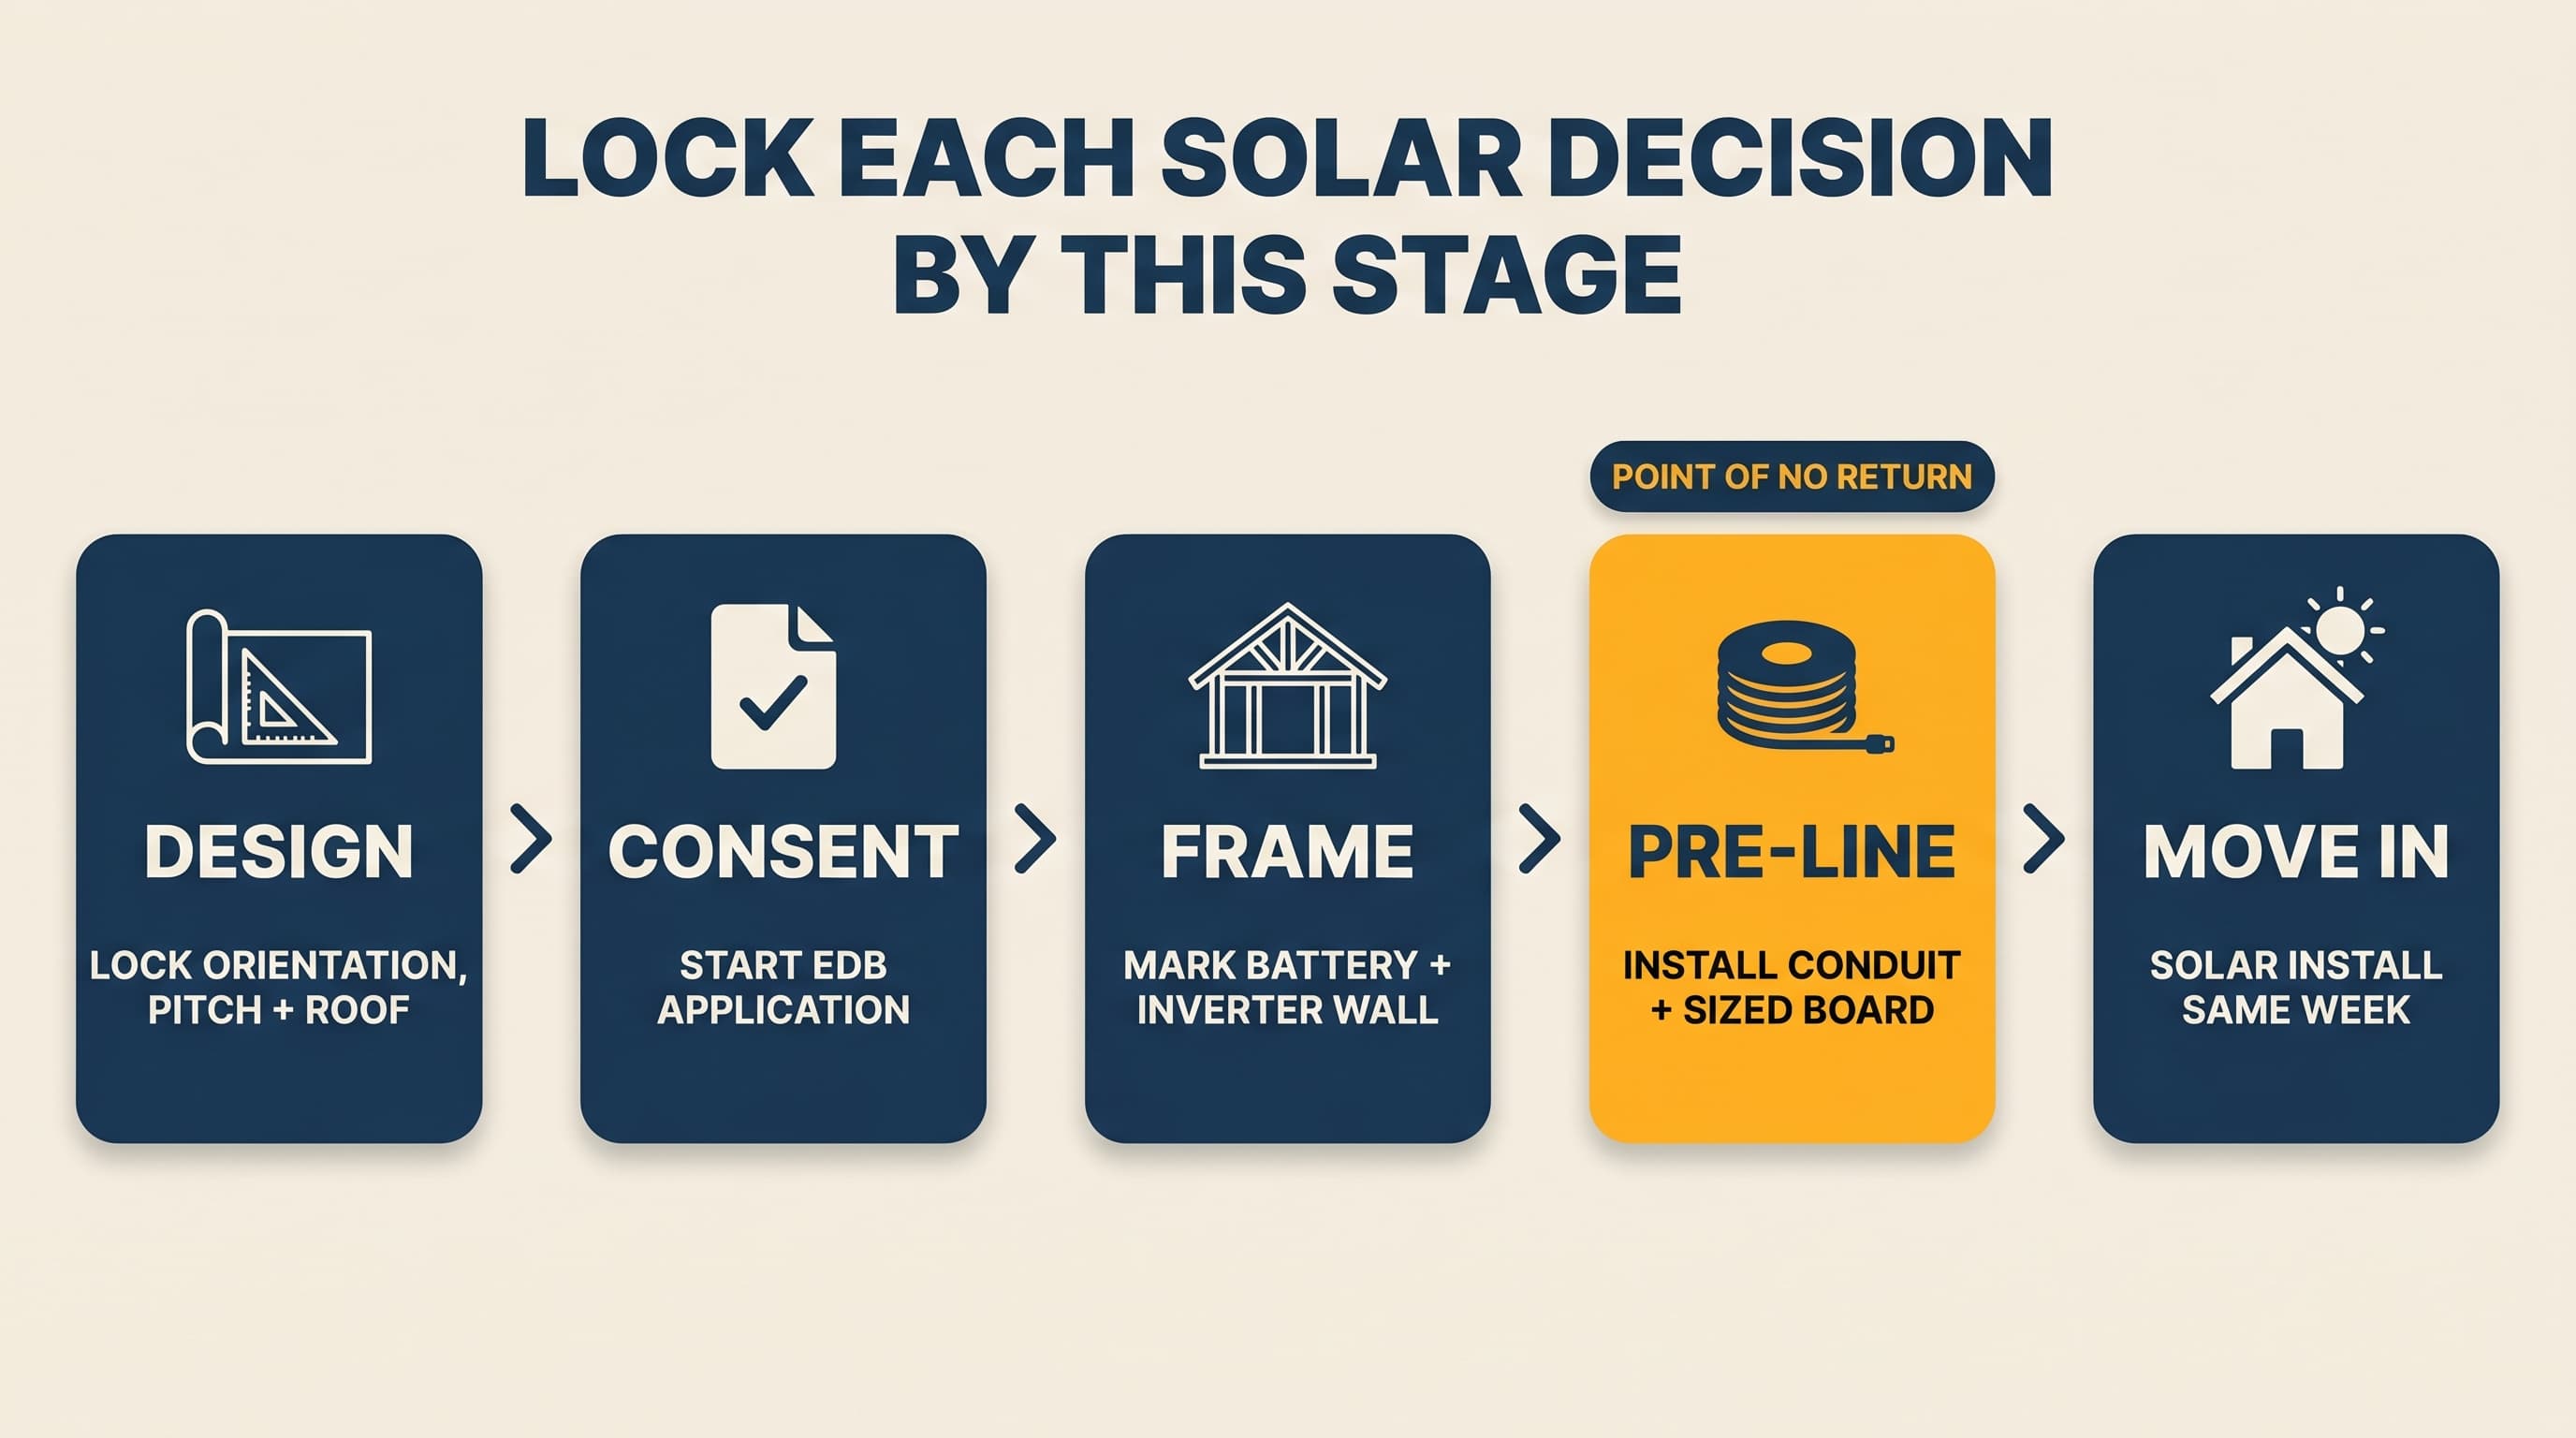
Eight decisions. All of them get made during a typical NZ residential build, whether you're paying attention or not. The difference between "got it right" and "kicking yourself in three years" usually comes down to whether someone raised the question at the right stage.
Total cost differential, end to end: somewhere between $5,000 and $13,000 you don't have to spend later, if you make the right calls at the right stages of the build. None of these decisions need to be made on day one. But they all need to be made by Pre-Line at the latest. After GIB goes up, your costs roughly triple.
For the Architect or Builder Reading This
Designer & builder quick-reference
Skip to the technical bits: pre-wire conduit and switchboard sizing, inverter location, and EDB timing (start at consent stage, not CCC).
Design-stage default: north-facing roof, 20-35° pitch, steel cladding, and an empty 32mm conduit from the ceiling cavity to the board. Build cost under $1,000. Retrofit value: $5,000-$13,000.
Roof Design Decisions (Where You Have the Most Leverage)
Orientation
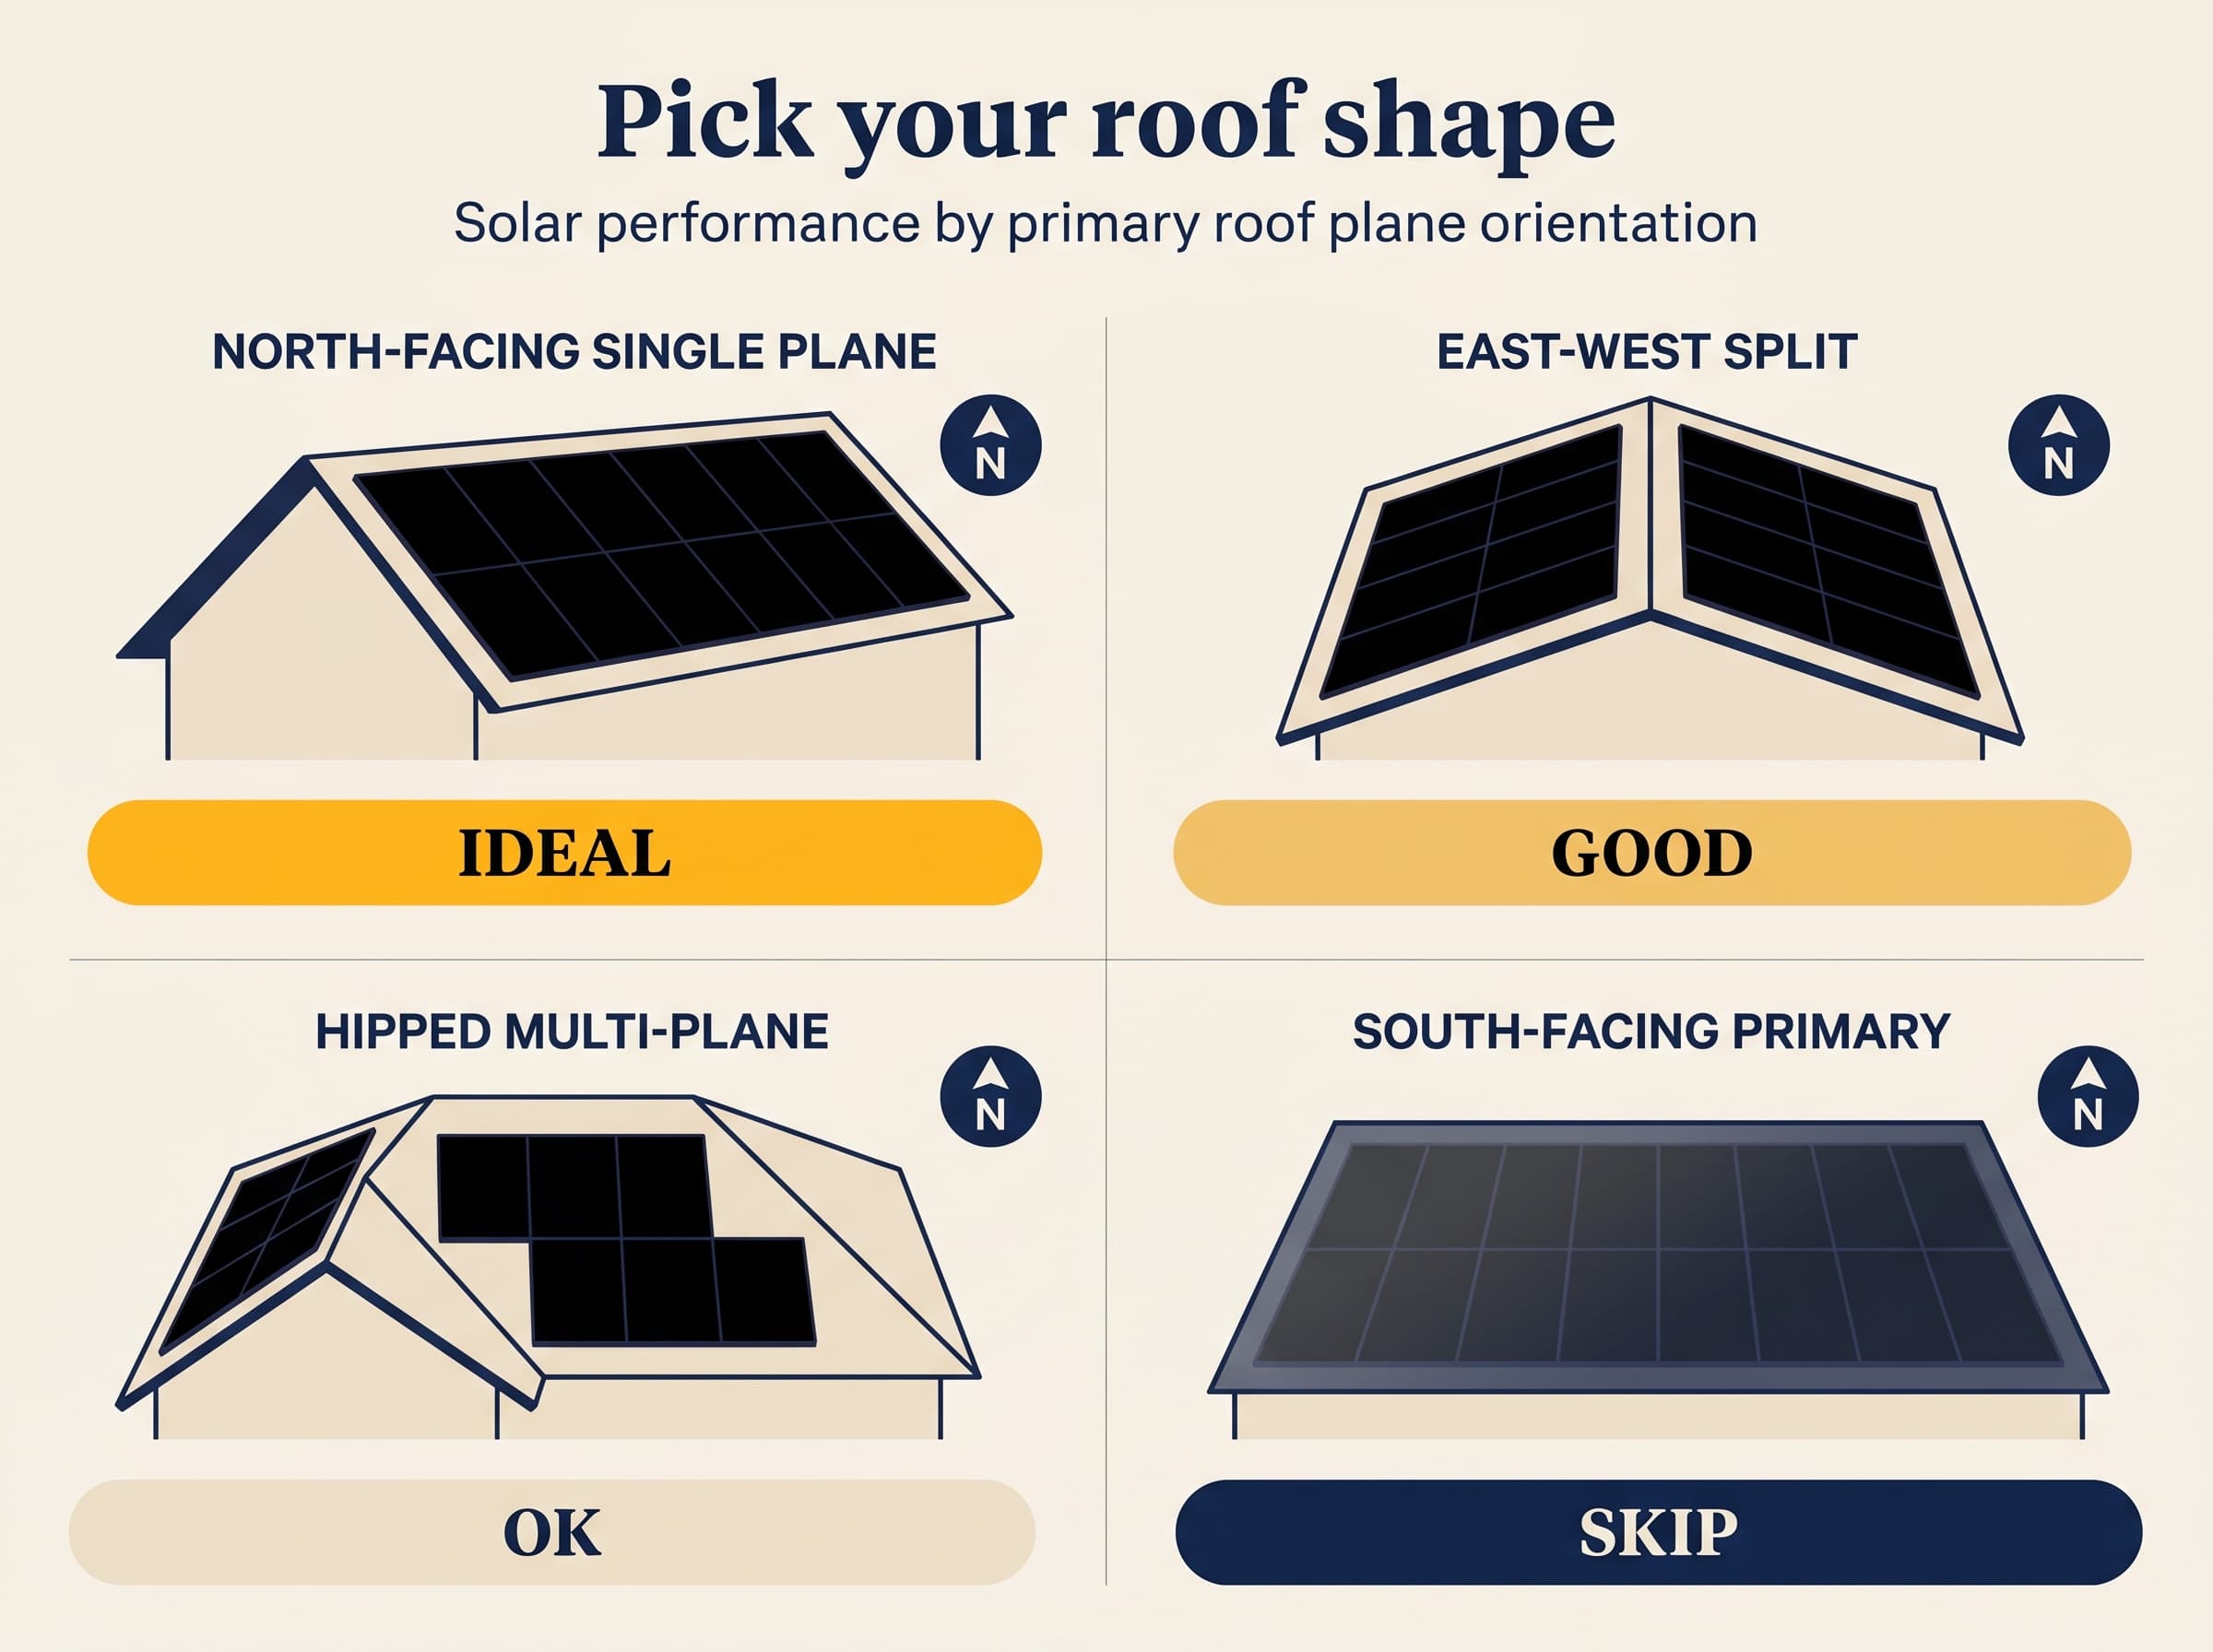
North-facing primary roof plane is ideal for NZ (Northern Hemisphere flipped, south-facing is the worst). East-west split is workable and increasingly common for modern architecture, but output drops 15-20% versus north-facing. South-facing primary plane gets roughly half the annual generation of north-facing and is generally too poor for a primary solar surface.
If the section has a great view to the south, you can still have your view. The architect can design a primary roof plane facing north (street side or back garden) and a secondary plane that follows the view. Solar goes on the north plane. Once trusses are up, you don't get to change this without re-roofing.
Pitch
Optimal range for NZ: 20-35°. Latitude rule of thumb is pitch = latitude (Auckland 37°, Wellington 41°, Christchurch 43°), but lower pitches catch more summer sun and let rain wash the panels.
A 5° pitch is fine for solar (lower output, slightly higher cleaning maintenance). A 50° pitch works too but starts to lose efficiency in summer. Avoid pitch under 5° (essentially flat). Water and debris pool, and you'll need a tilt frame retrofit ($1,000-$3,000) to get the panels off the surface.
Material
- Corrugated steel or standing-seam steel: solar's best friend. Installers can clamp directly to the seams or use mid-clamps with no roof penetration. $0 surcharge for solar mounting on these.
- Concrete tile: workable but slower install (tile-and-hook mounts), and any cracked tile during install needs replacement. Add $500-$1,000 to a typical install.
- Clay or slate tile:skilled trades only, higher penetration risk. Add $1,000-$2,500 to a typical install. Some installers won't touch slate.
- Membrane / butynol flat roofs: mounting requires ballast or specialised brackets. Add $1,000-$2,000.
If you're choosing materials anyway, steel costs the same or less than concrete tile up front. The solar-friendliness is a bonus.
Pre-Wiring & Switchboard (The Highest-ROI Single Decision)
What a pre-wire actually is
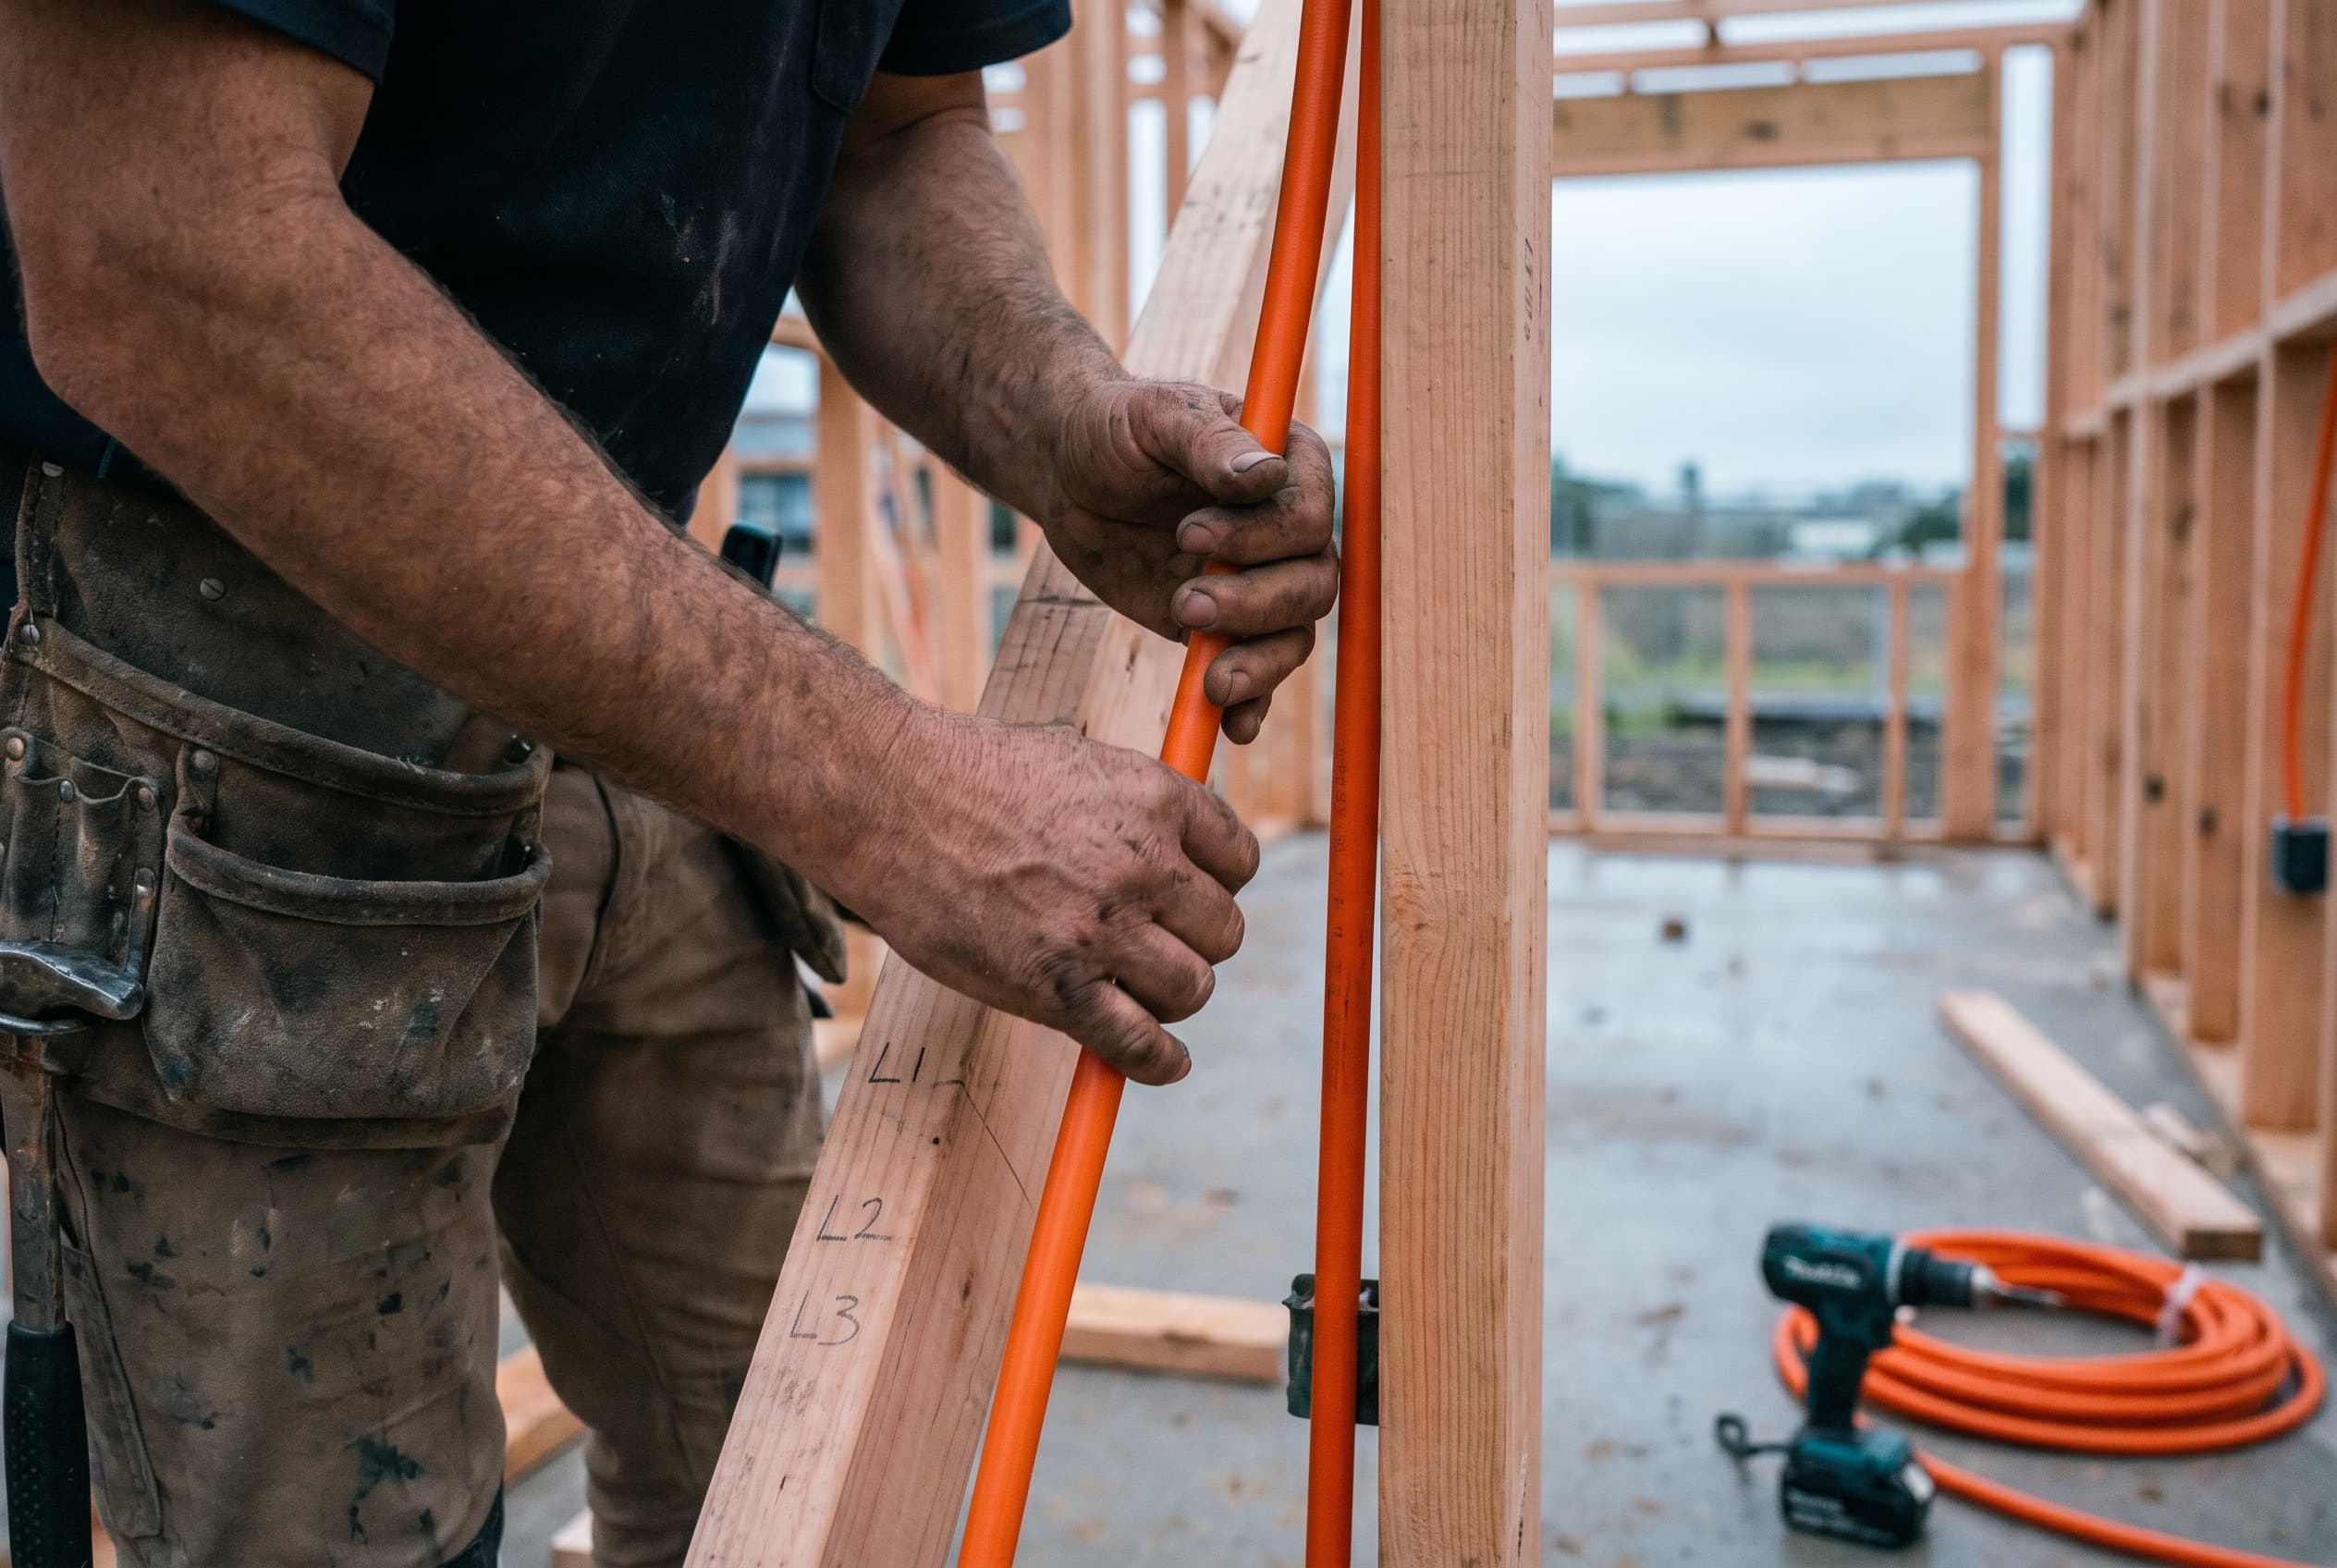
A pre-wire is an empty conduit running from the ceiling cavity (where the panels will land) down through a wall and into the meter board (switchboard). 32mm OD orange conduit is the standard in NZ residential. Two conduit runs is modern best practice: one for DC cable from the panels to the inverter, one for AC from the inverter to the board. If your inverter is going on a separate wall from the board, you'll want a third conduit too.
The runs should be installed during the electrical pre-line stage, before the GIB goes up. After GIB, the cost roughly triples because the sparky has to cut, fish, patch, and you have to repaint.
Cost and ROI
Pre-wire at build time: $200-$500 for materials plus the electrician's time during their normal pre-line visit. Retrofit cost: $2,000-$5,000. The breakdown is roughly $400-$800 for electrician labour, $200-$400 for the cable and fittings, and $1,400-$3,800 for GIB-stop, patching, sanding, and repainting (because they cut a hole through your ceiling, fed the cable down a wall cavity, and now have to fix the damage).
Even if you never install solar, the empty conduit is a $300 insurance policy on a decision you might make in five years. Worth it.
Switchboard sizing
- The minimum size that future-proofs solar: 12-way switchboard with 2-4 spare ways, 80-100A main feed.
- A 6-way board (still common in spec houses) will not fit solar + heat pump + EV + battery. Upsizing later is a board replacement, $1,500-$3,500.
- Stainless steel meter cupboard if the board is external. Coastal NZ kills painted cupboards in five years.
- If you're undecided on EV, install the spare breaker slot and run an empty 32A conduit to the garage anyway. No EV cable needed yet, just the conduit.
Want to compare
quotes?
Get matched with vetted local installers and see real quotes for your home. It’s free, with no obligation.
Compare up to 3 quotesBattery-Ready Wall (Designate Now, Buy Later)
A battery-ready wall is not a battery. It's a designated wall location that meets the requirements for one when you do buy it.
- Recommended space: 1m wide × 1m tall × 0.3m deep, with 1m clearance in front and 1m horizontal clearance from any window or door (lithium chemistry needs venting).
- Garage internal wall is ideal. External walls work if sheltered and not in direct afternoon sun (heat shortens battery life).
- Cool, dry, ventilated. Don't put it in a laundry next to the dryer vent.
- Mark it on the architect's plans now. Costs $0 at design. Costs $500-$2,000 to relocate a power outlet, run a sub-feed, and possibly upgrade fire-rating later.
If you're sure you want a battery from day one, see our solar battery storage guide and Powerwall alternatives for the actual purchase decision.
Inverter Location (The Easily-Missed Decision)
The inverter is a box that lives on a wall somewhere between the panels and the switchboard.
- Best location: garage internal wall, near the switchboard, away from afternoon sun, ventilated.
- Worst location: external north-facing wall in full sun. The inverter cooks itself slowly, output drops on hot days, warranty conversations get awkward.
- The inverter is the single most failure-prone component in a solar system (10-15 year typical replacement versus 25-30 year panels). Make it easy to replace, meaning accessible, not buried behind a fixed wall unit.
- Microinverters change this conversation. They live under the panels with no central box on a wall. See string inverter vs microinverter for the comparison.
At design stage, mark a 1m × 0.5m wall space inside the garage near the board. Even if you go microinverter later, you'll be glad of the gateway-and-comms wall space.
The Cost: Build-In vs Retrofit
Add up the cost-at-build-time column and the cost-as-retrofit column from the checklist in section 3. The differential is the actual ROI of paying attention now.
Headline number: $5,000 to $13,000 saved. Even at the low end, that's a full year of power for a typical Kiwi family.
EDB Application Timing (The Bit That Surprises People)
- The EDB (Electricity Distribution Business, your local network like Vector, Wellington Electricity, Orion, Powerco) approves your right to connect a generator to their network. This is called Distributed Generation (DG) approval.
- Without DG approval, you can have panels on the roof but you can't legally export power to the grid.
- DG applications take typically 4-8 weeks. Some EDBs are faster, some are slower. Coastal Otago vs central Auckland will differ.
- Most homeowners don't start the DG application until after the install. That's fine for a retrofit. For a new build, you can start the application as early as building consent stage, because the EDB only needs the design drawings and the solar system spec.
- Starting at consent stage means: by the time you're at Code of Compliance Certificate (CCC), your DG is already approved. You can fire up the system the day you move in. Not three months later.
Use the solar installation process guide for the deeper EDB walkthrough. That guide covers the full process for any install, retrofit or new build.
Working With Your Architect and Builder
At the architect concept stage
- "Can we make the primary roof plane north-facing?"
- "What's the proposed roof pitch? Are we in the 20-35° range?"
- "What roof material are we specifying?"
- Show them this guide. Most architects appreciate a homeowner who's done the homework.
At the electrical design stage
- "Are we specifying a 12-way switchboard with spare ways, 80-100A main?"
- "Can we add a 32mm conduit from the ceiling cavity to the meter board? Two if possible, one DC, one AC."
- "Can we run a 32mm conduit to the garage for a future EV charger?"
- "Where's the inverter going on the plans? Is it shaded?"
- "Have we designated a battery-ready wall space?"
At consent and pre-line stages
- "Has the EDB DG application started?"
- "Is the conduit installed before GIB goes on?"
- "Have we confirmed the switchboard is the right size for the building consent's load schedule?"
Worked Example: A 4-Bed Mt Roskill New Build
Mt Roskill, Auckland. Build cost: ~$650k. Homeowner: a young family planning to move in late 2026. They want solar eventually, probably in 2-3 years, once the build cash flow recovers.
At design stage, the architect agrees to a north-facing primary roof plane at 27° pitch, standing-seam steel. The homeowner asks the electrician for two empty 32mm conduits from the ceiling cavity to the meter board (DC and AC), a 32mm conduit from the board to the garage for a future EV charger, and a 12-way switchboard with a 100A main feed. A battery wall location is marked on the garage internal wall, 1.2m wide, ventilated.
Total extra cost during the build: around $1,200. The homeowner gets a CCC, moves in, and three years later signs a $14,000 solar + battery contract. Install day: half a day instead of three days, because the conduits are already in place. The retrofit version of the same install (cutting GIB, fishing cables, board upgrade) would have added around $7,000 to the same $14,000 quote. They paid $1,200 to save $7,000.
Numbers above are illustrative and based on Auckland trade pricing at the time of writing. Your build will differ. The directional ROI of pre-wiring is consistent across NZ regions and build sizes.
Next steps for your solar journey
Want to compare
quotes?
Get matched with vetted local installers and see real quotes for your home. It’s free, with no obligation.
Compare up to 3 quotesFrequently Asked Questions
Can I just install solar later if I don't want it now?
Yes, that's the whole point of pre-wiring. The empty conduit and oversized switchboard cost a few hundred dollars during the build and let you defer the actual solar purchase indefinitely. You're not committing to solar by getting solar-ready.
How much does it cost to add solar pre-wire to a new build?
Around $200-$500 in materials and electrician time during the normal pre-line stage. The same work as a retrofit costs $2,000-$5,000 because of GIB cutting, cable fishing, patching, and repainting.
What roof orientation is best for solar in NZ?
North-facing is ideal. East-west split planes work with a 15-20% output reduction. South-facing as a primary surface is generally too poor for solar, with output around half of north-facing.
What roof pitch is best for solar in NZ?
20-35° is the optimal range. Roof pitch close to your latitude (Auckland 37°, Wellington 41°, Christchurch 43°) is the rule of thumb, but lower pitches catch more summer sun and let rain wash the panels.
Can I use solar with a concrete or clay tile roof?
Yes, but it costs more. Concrete tile adds $500-$1,000 to a typical install. Clay or slate adds $1,000-$2,500 because of skilled-trade penetration work. Standing-seam or corrugated steel is the cheapest and most solar-friendly material.
How big should the switchboard be for a new build with future solar?
12-way with 2-4 spare ways, 80-100A main feed. A 6-way board (still common in spec houses) won't fit solar + heat pump + EV + battery, and upgrading later costs $1,500-$3,500.
Should I install a battery now or wait?
Generally wait, but designate the wall space now. Battery prices fall every year and the technology is still maturing. A designated 1m × 0.5m wall location (ventilated, away from doorways) costs nothing to plan and saves $500-$2,000 in relocations later.
When does the solar installer get involved in the build process?
At the pre-line / electrical rough-in stage at the latest. Best practice is to involve them at design stage. Most installers will give a 30-minute design review for free, especially if you're a likely future customer. They'll spec the conduits and switchboard size for your specific install plan.
What's the EDB application and when should I start it?
The DG (Distributed Generation) application is your right-to-connect-and-export approval from your local network. It takes 4-8 weeks typically. For a new build, you can start it at consent stage. The EDB only needs the design drawings and the solar system spec. Starting early means your DG is approved by CCC.
Does adding solar pre-wire affect my building consent or CCC?
No. Empty conduit, an oversized switchboard, and a designated wall space are all normal electrical inclusions that your sparky signs off as part of the electrical certificate. No additional consent or inspection is needed.
Related guides
View all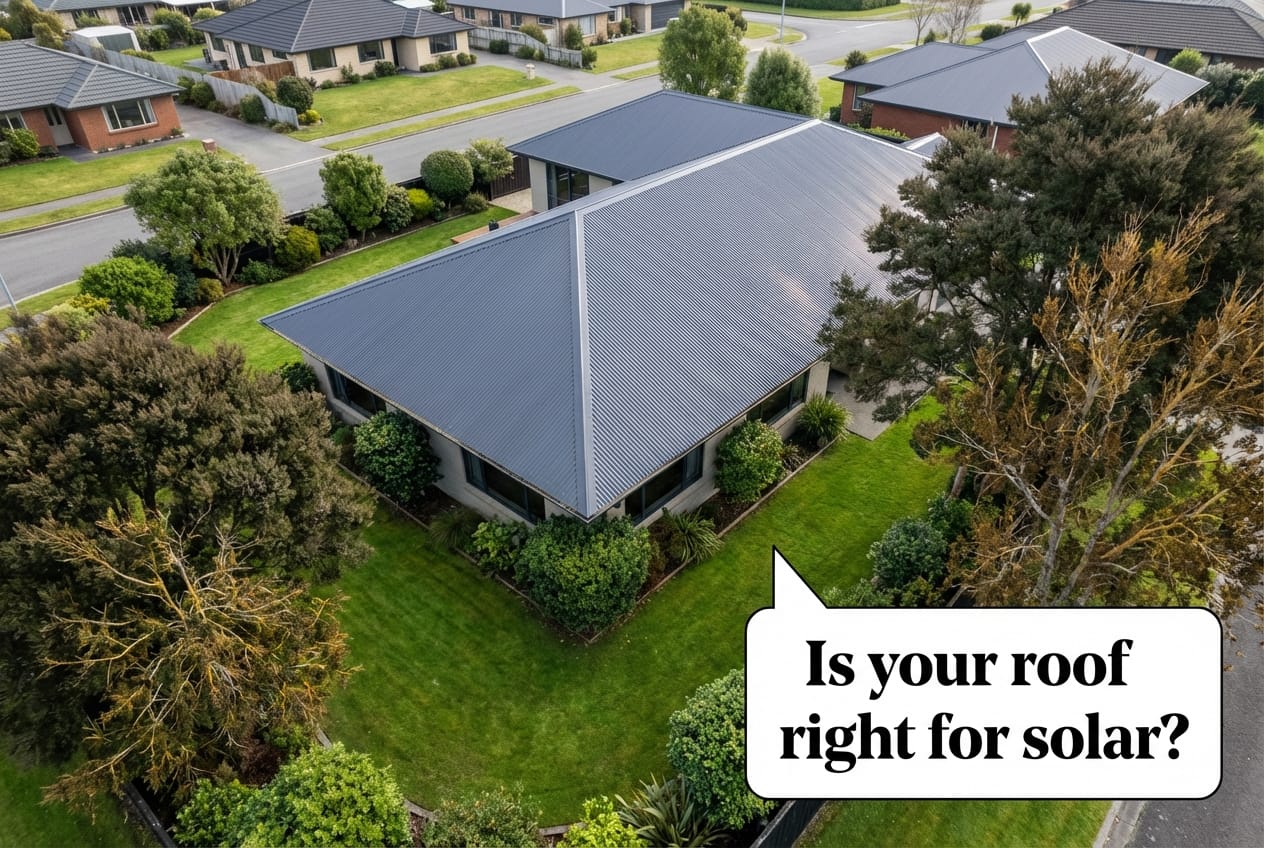
Is My House Suitable for Solar Panels?
Check if your NZ home is right for solar. Roof direction, pitch, shade, and structural factors explained for Kiwi houses.
Read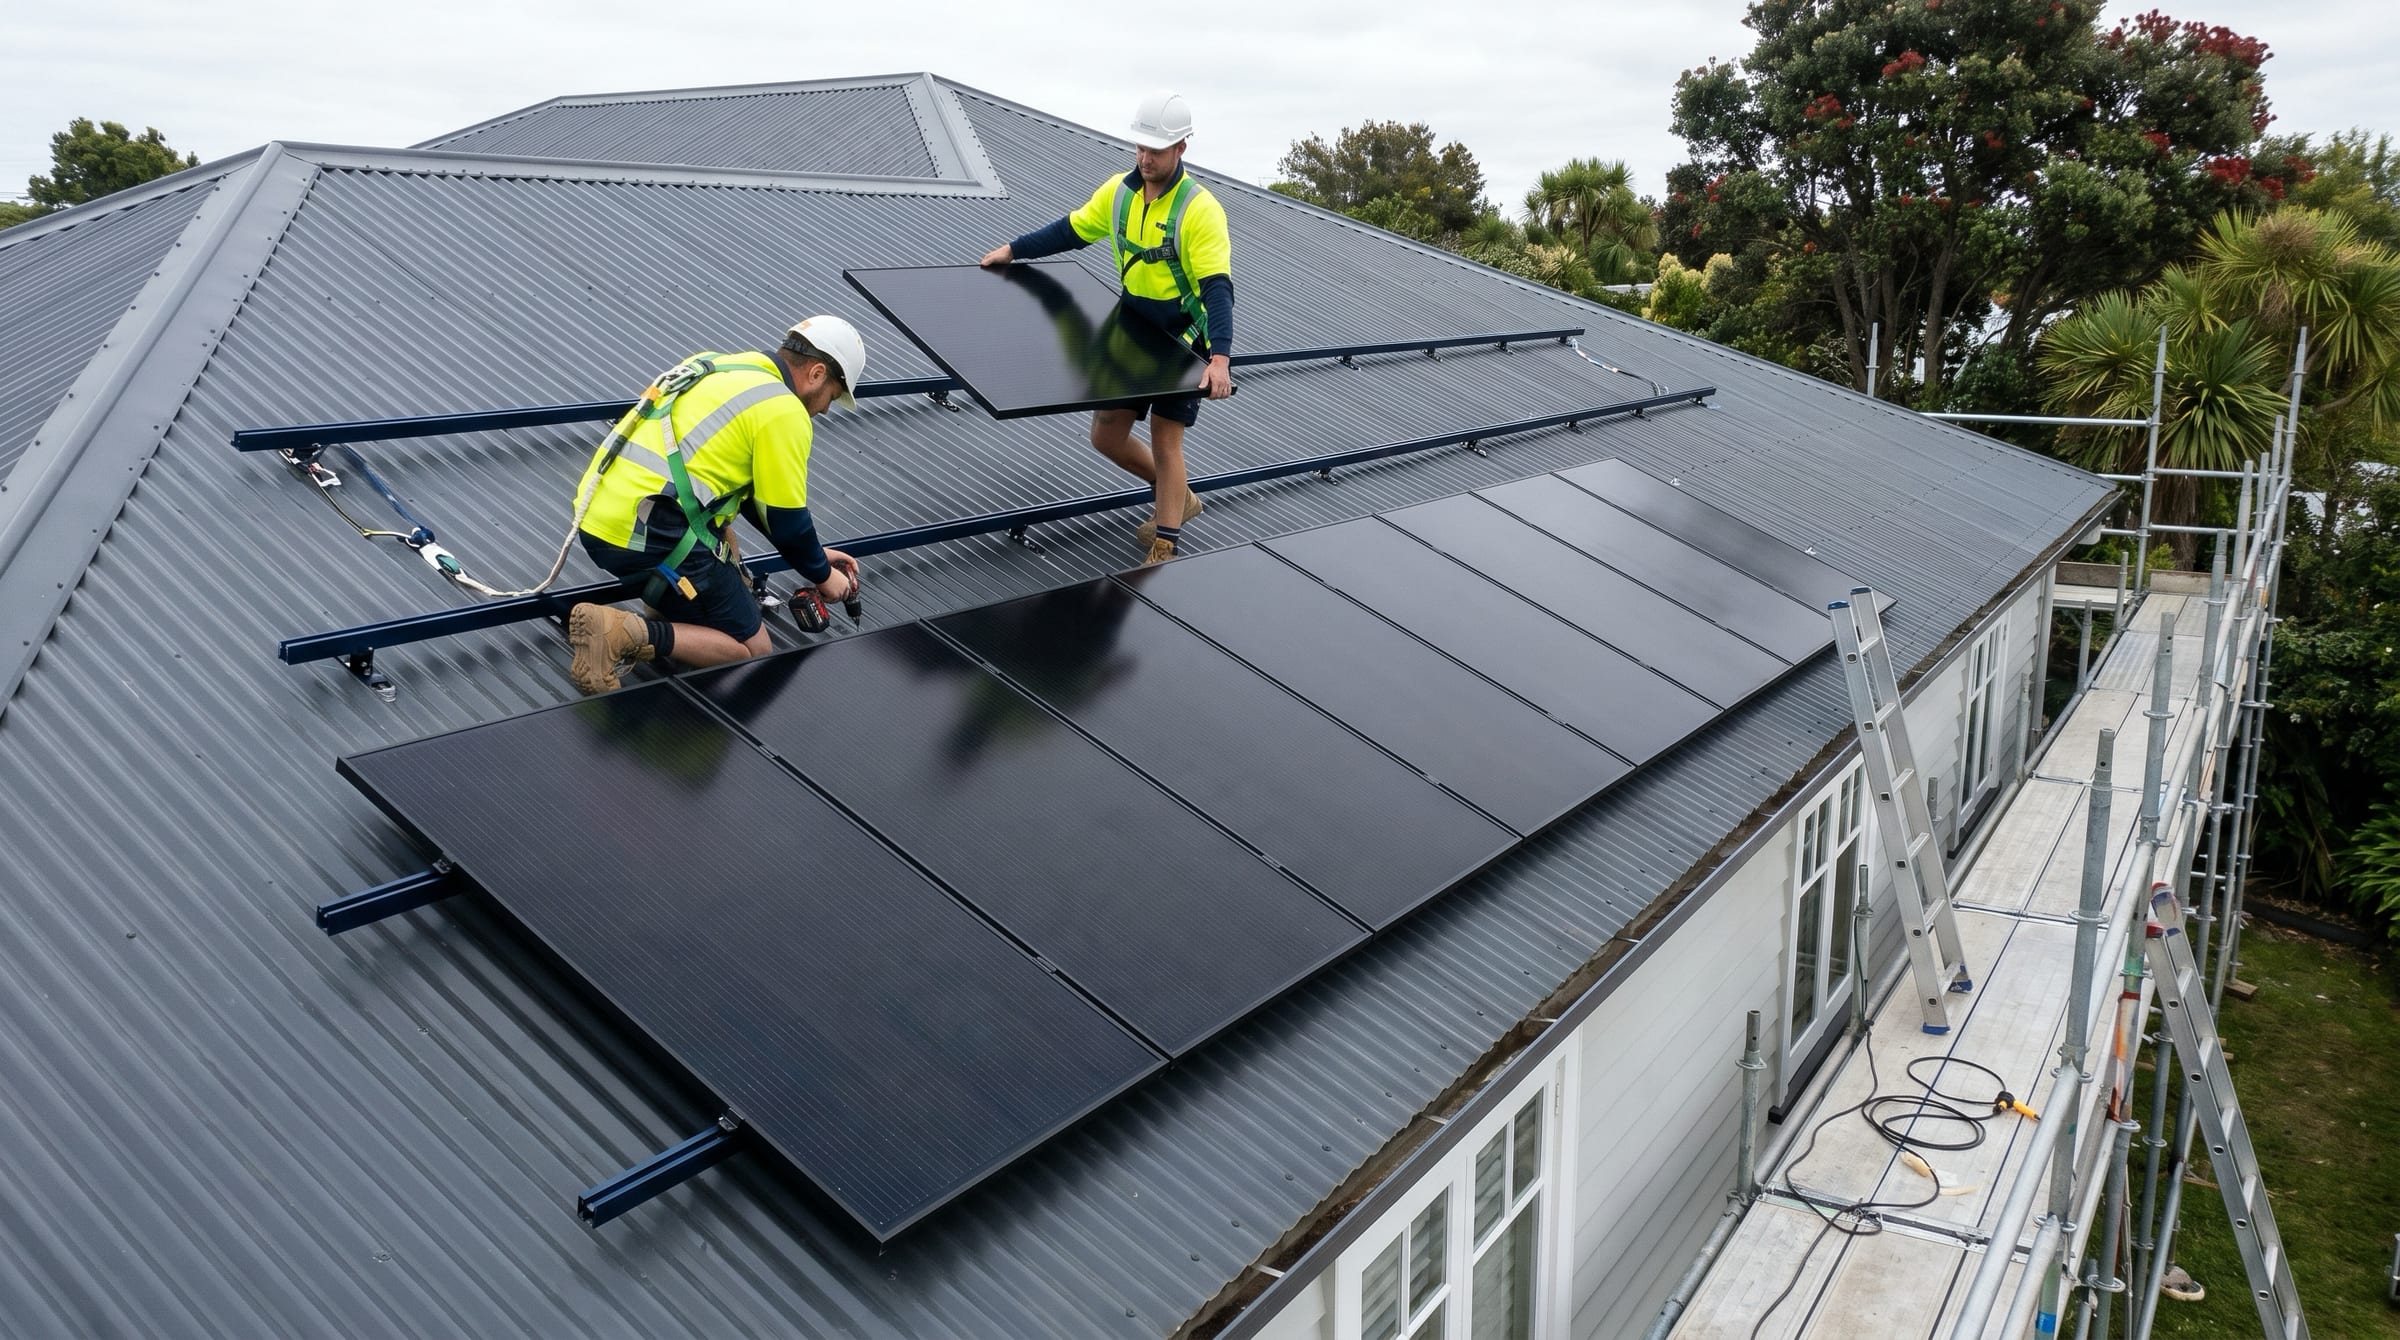
Solar Panel Installation in NZ: What Happens, Step by Step
The complete NZ solar installation timeline: 4-8 weeks from quote to live system. DG approvals, install day, meter upgrades, and the delays nobody warns you about.
Read
Solar Panel Costs NZ: What You'll Actually Pay in 2026
Real pricing data for NZ solar in 2026. System costs by size, what affects price, and how to tell if a quote is fair.
Read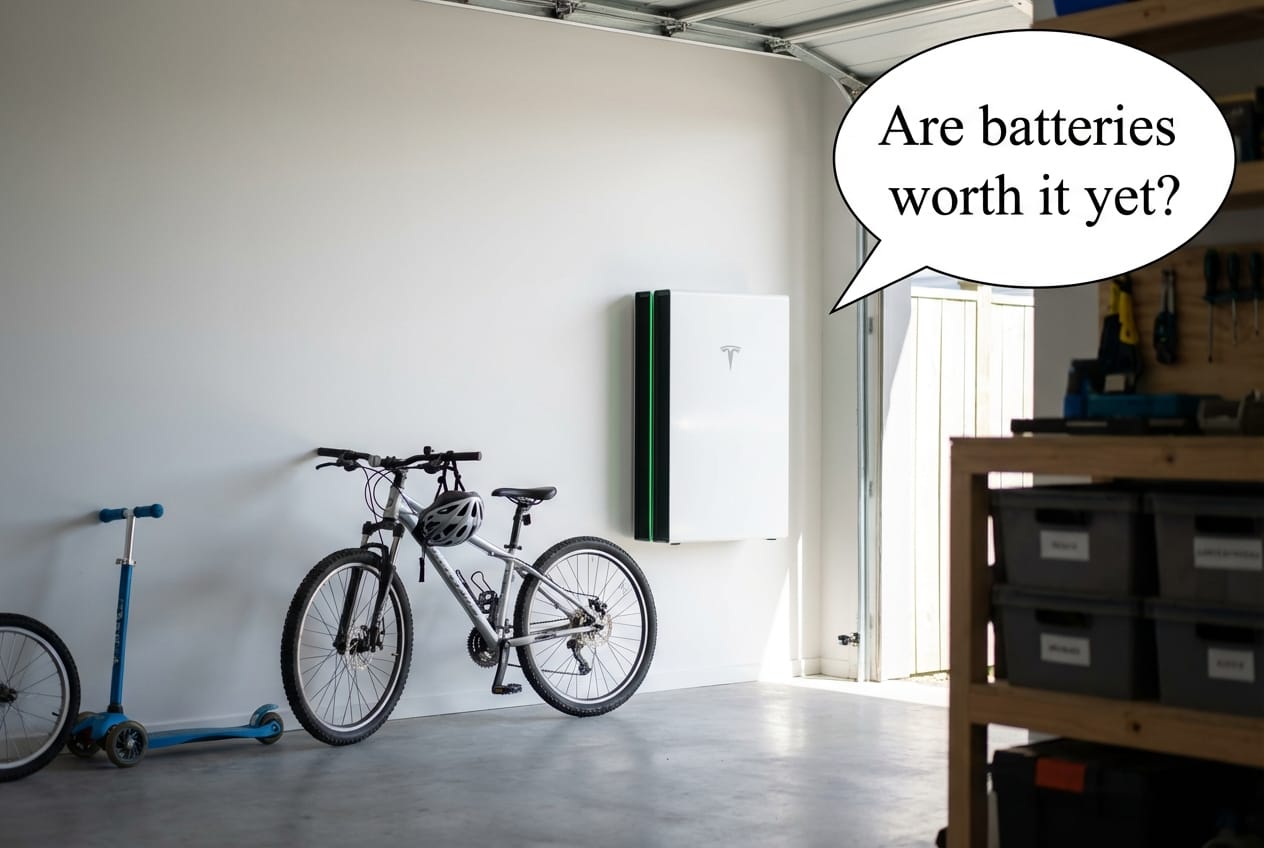
Solar Battery Storage NZ: Costs, Brands, and Is It Worth It?
Solar battery prices in NZ: Tesla Powerwall, BYD, Enphase compared. When batteries make sense and when you're better off without one.
Read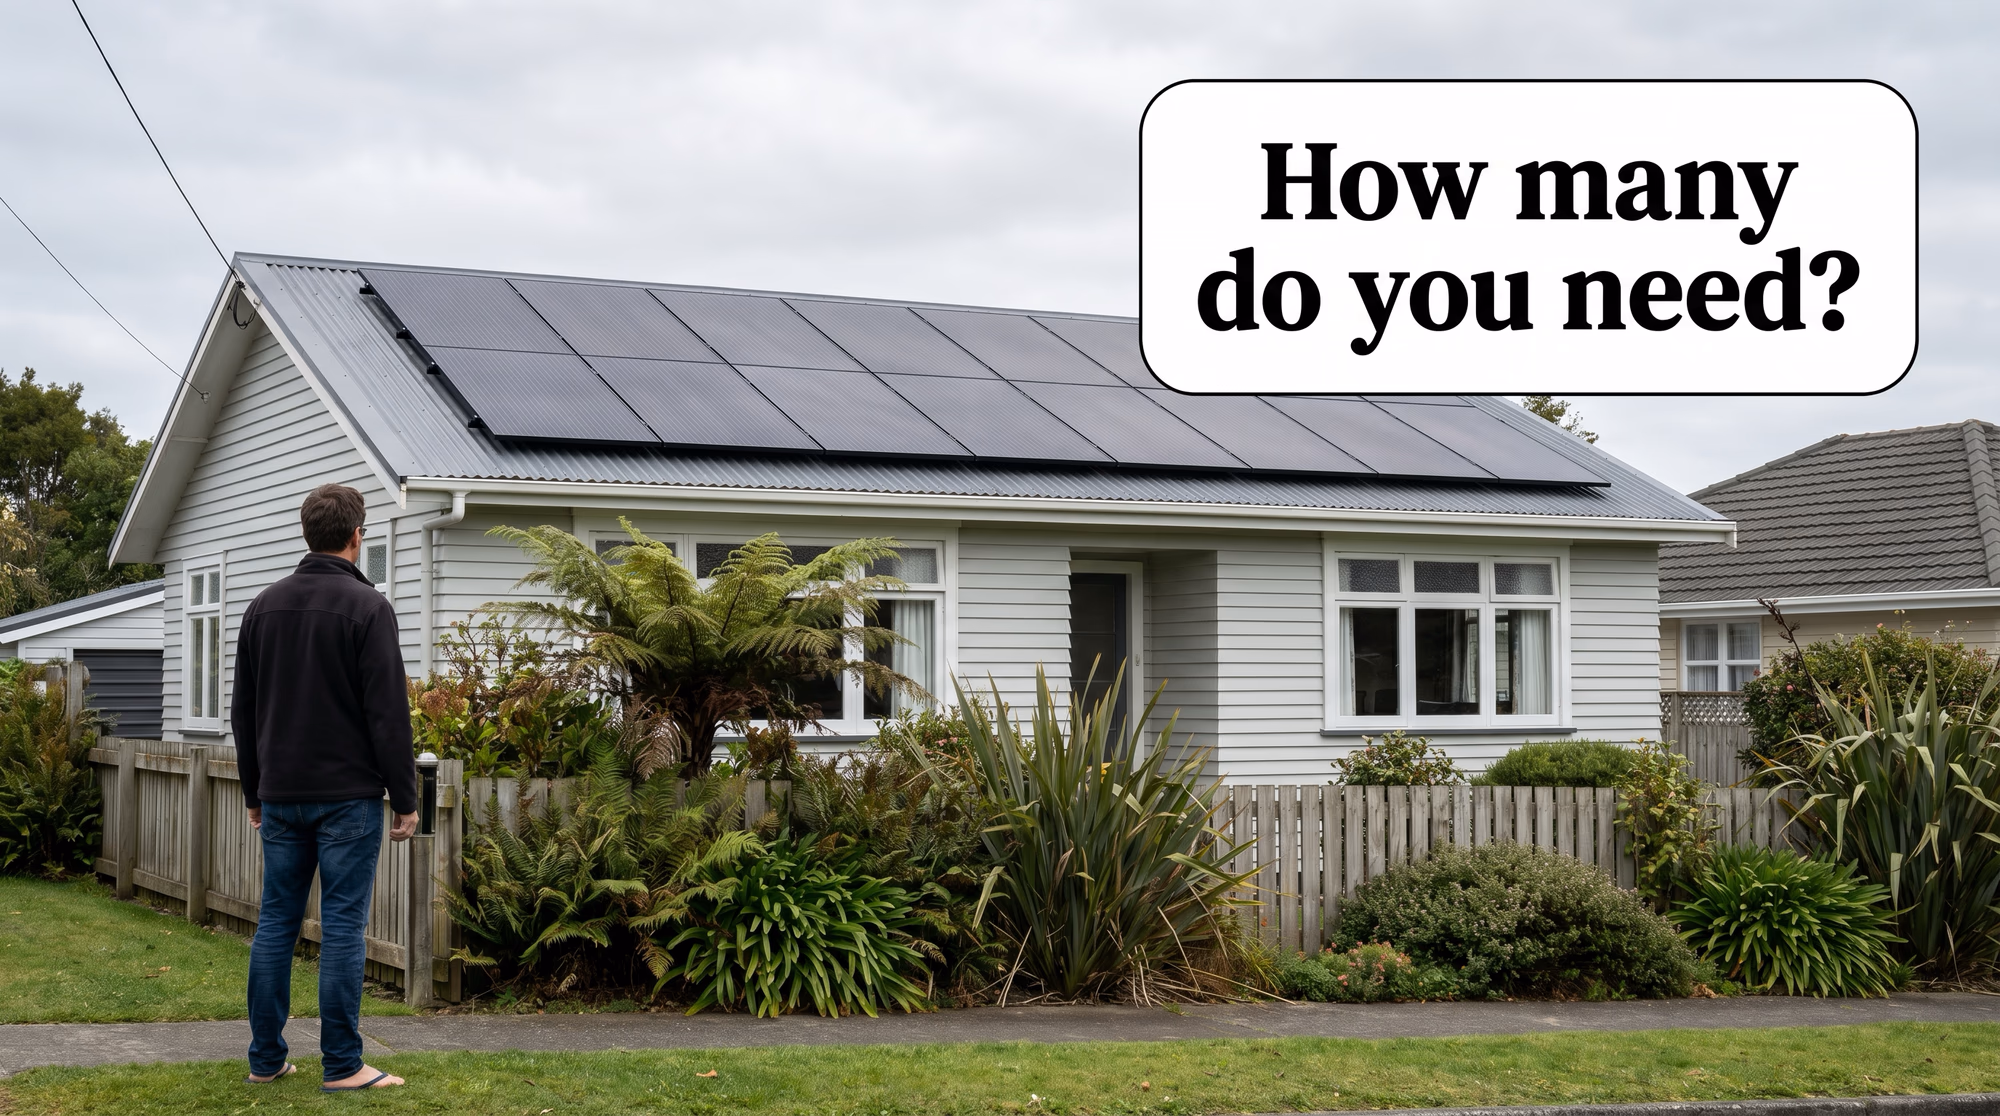
How Many Solar Panels Do I Need?
Work out how many solar panels your NZ home needs. Based on your power usage, roof space, and whether you're adding a battery or EV charger.
Read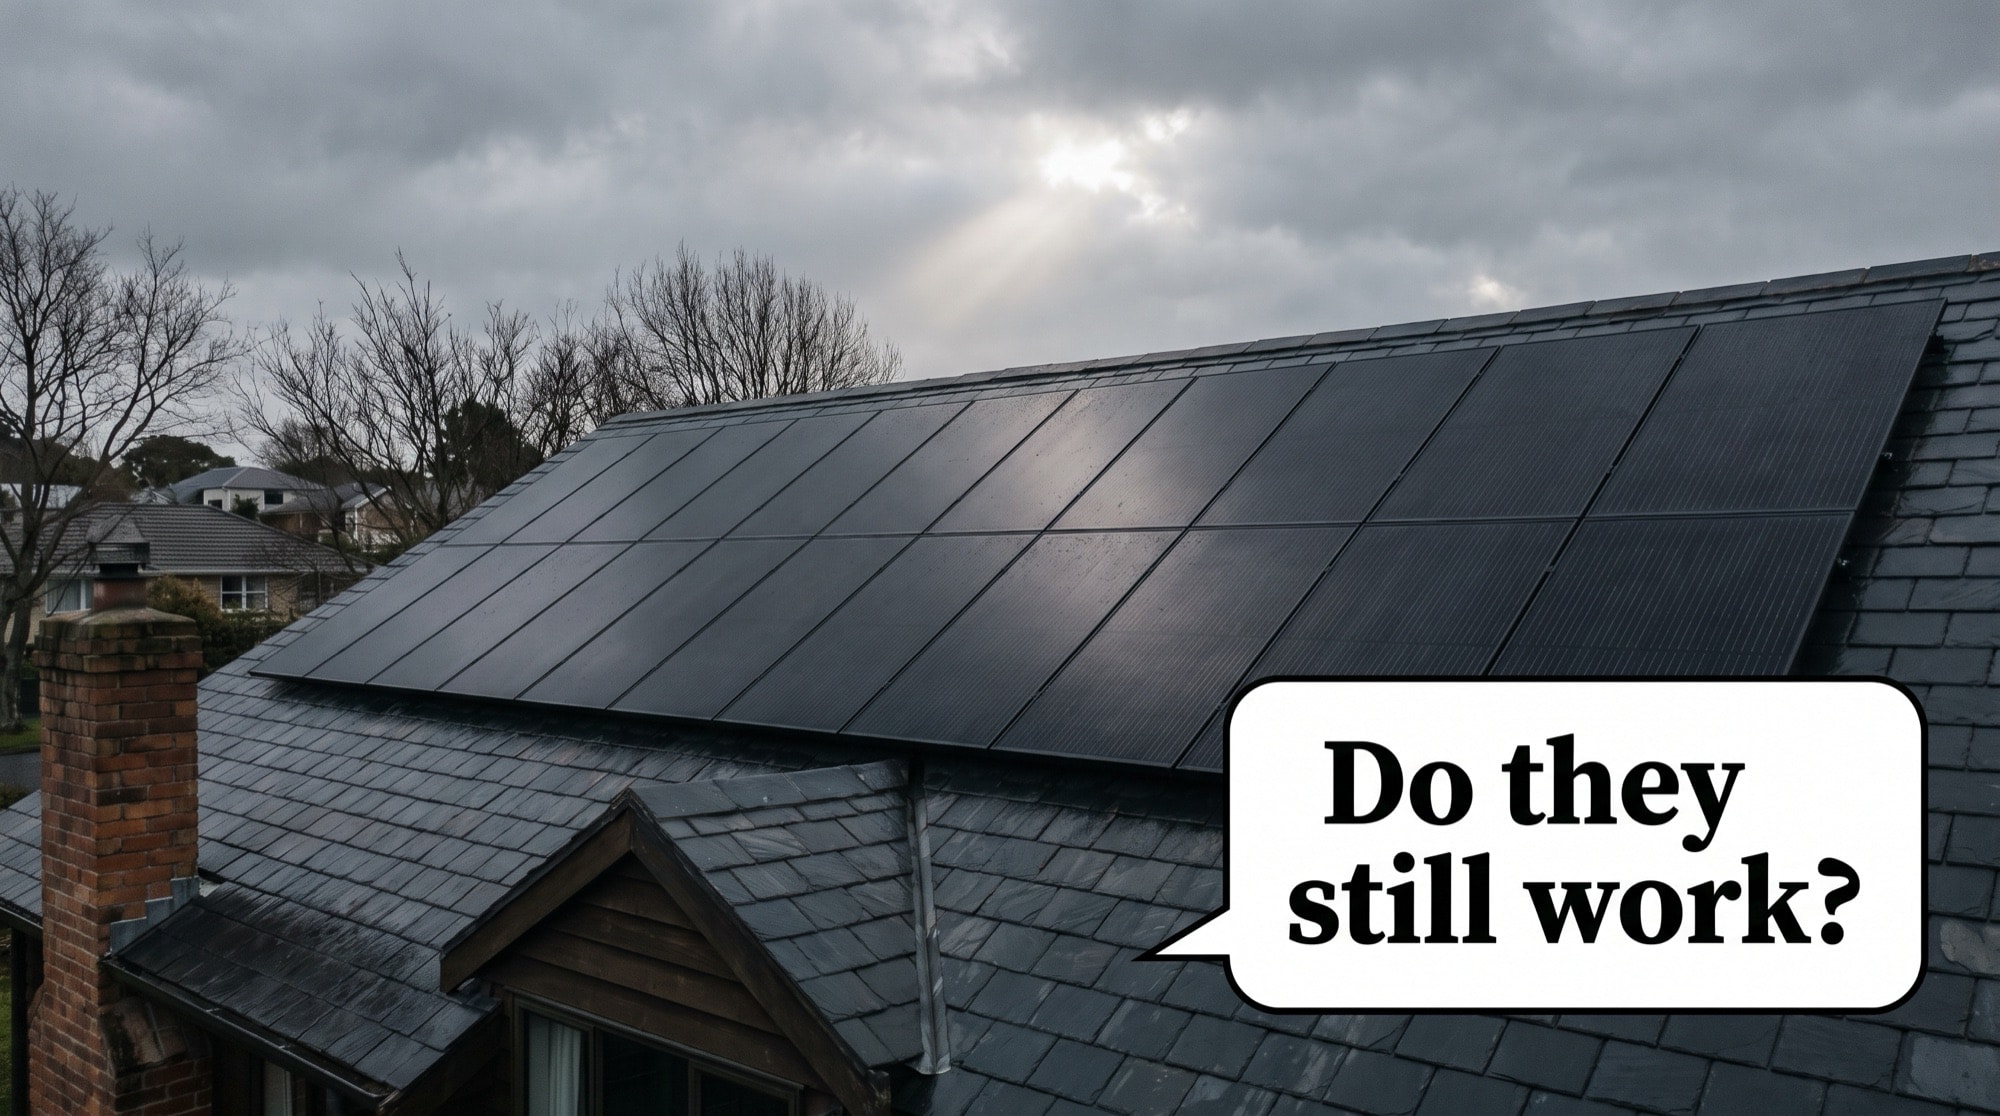
Do Solar Panels Work in Winter and on Cloudy Days in NZ?
Solar panels still generate power on cloudy days and through NZ winters. Here's exactly how much output changes and why it still works.
Read
Join the conversation
The best comments here are honest ones: real names, real numbers and real experience. Share yours, please stay civil and on topic. No self-promo links.
Your email is never shown or shared. To change or remove a comment later, .
No comments yet. What is your experience with this? Be the first to weigh in.